|
David Long
For those that inquired about my leg, the one that is both Left and Left, here are a couple of pictures that probably better explains it than I did at the reunion.
.jpg)
This goes on what's left of my residual limb. It's a silicone sleeve with gaskets on the outside.
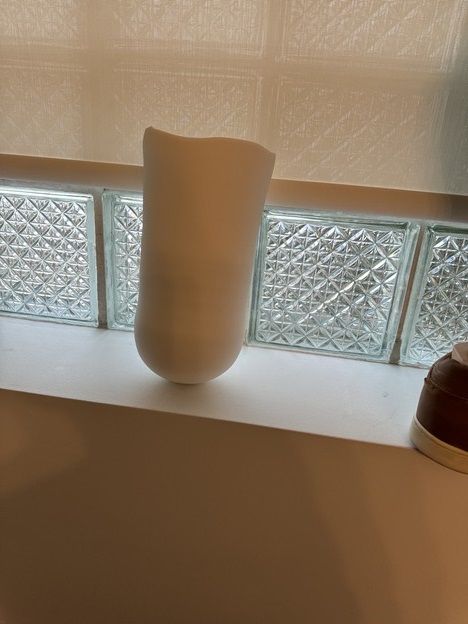
It's turned inside out and then rolled / pulled onto limb. The socket is held on via suction.

This is the socket (black) and knee joint (silver). The blue device is a rotator ring that allows me to turn the lower part of the leg upside down to facilitate changing shoes or slacks. It's also convenient if you're at a ball game and don't have a drink holder as you can turn the foot completely upside down and use the sole on which to rest your container.
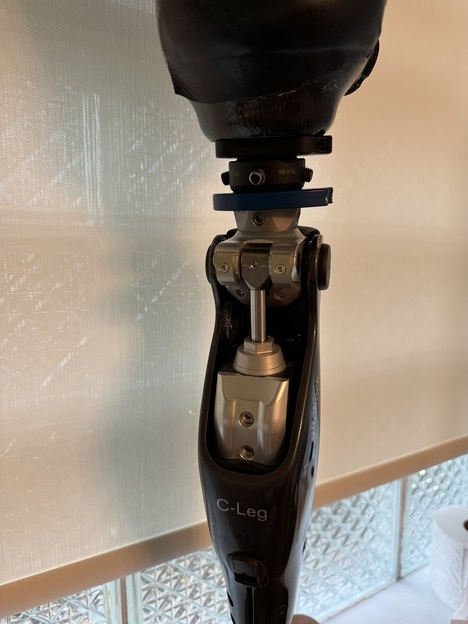
This is the base of the leg. Pictured are the hydraulics, and the housing for the micro processor. The micro processor senses weight shifts when I wish to take a step and signals the 'knee' to bend. It unfortunately doesn't always get it right, but I'm happy to have it. It has been known to buckle even when standing still and straight, which it seems to do when we're attending Mass.
As you might expect, all these conveniences come at a price. I'm not talking about $$$, although it's not like the $ Million Dollar Man, I'm fortunate that the VA is paying for it, but it's heavy. Think having a 25# weight hanging just below your waist and the only way you have to move it is tighten your gluts and swing your hip.
.jpg)
This is everything put together - oops forgot to mention the prosthetic 'foot'. It's made from metal and carbon fiber. It is not flexible thus changing shoes is an issue. Loafers are now, not an option.
That's a custom, USMC logo'd, socket. I go in to start the fitting process for a new socket, #8, and a new 'below the knee' leg. The socket is supposed to shorter and lighter, and less intrusive into the groin and butt - this one is like sitting on hard plastic. The leg is supposed to have better weight distribution by moving the micro processor higher in what would be the calf. We'll see and hope for the best.
The Process:
Take the leg off. Stand there in your skivvies and in a gauze jump suit. The prosthetist, Kate, then prepares the fiber wraps by heating them in warm water.
Wrap the stump in fiber. Stand still for 5 - 8 minutes while the fiber dries.
Get the jump suit cut off - hoping she doesn't accidently also cut off the skivvies (only happened once - but I'm sure my former prosthetist, Becca, is still laughing).
Cast is removed
I leave.
Come back in a week
Try on the test socket (clear plastic)
Walk in for 10 minutes
Locate hot spots where blisters would start to form
Mark up test socket
Go home.
Come back in another week to try on a new test socket
Walk to locate any hot spots
Mark up test socket.
Go home.
Come back in another week to try on new final socket fitted with
new prosthetic leg.
Program the new leg.
Walk around for 20 minutes of so.
Check stump for blisters.
If ok, leave.
Come back in 3 - 4 days to check fit and check for any breakdown in flesh.
Make adjustments adding padding where necessary and any needed changes to the programming.
Go home, come back in 2 weeks for final fitting, unless there is skin breakdown before then.
Go Home.
Live happily ever after until I have to do it all over again.
This will be my 8th socket since my amputation.
|


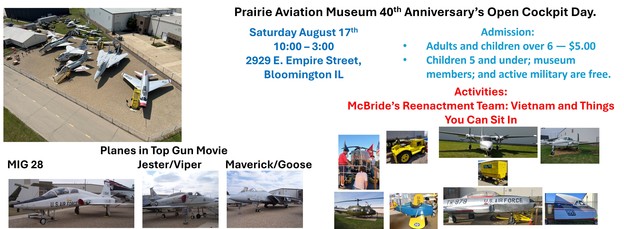 If you are looking for activities during the reunion weekend, please visit the Prairie Aviation Museum for our 40th Anniversay, Saturday the 17th from 10-3. Admission $5. 2929 E. Empire, near the old Arnie's (now the State Farm hanger).


 \
\